najnin.ih
« on: May 28, 2019, 01:57:37 PM »
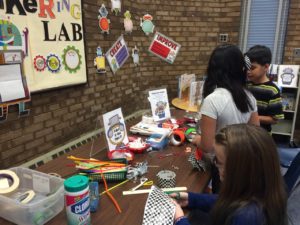
HOW DO YOU BEGIN A MAKERSPACE?Beginning a makerspace doesn’t mean that you need to run out and max out your or the school’s credit card buying tons of materials. To begin with, stock the space with items that are typically found around the house or school – small and larger boxes, paper towel and toilet paper tubes, egg cartons, masking and duct tape, as well as liquid and stick glue. Ask for donations from parents for other items such as wire, yarn, toothpicks, cups, recycled plastic containers. Tools needed might include screw drivers (flat head and Philips head), pliers, and scissors. You may need to purchase items such as feathers, pipe cleaners, brads, and craft sticks, but don’t hesitate to add those items to a donation request from businesses or parents. If possible, try to include old toys or small electronics to be taken apart to discover how things work. Broken toys can also be supplied for students to repair, furthering their knowledge of how things work. To help control the consumption of supplies, we strongly suggest that students first create a detailed plan for their project.
 READY TO GIVE A MAKERSPACE A TRY?1.Select an area for your classroom makerspace. You want room for 3-4 students to work with a display area for project ideas and a sturdy table.
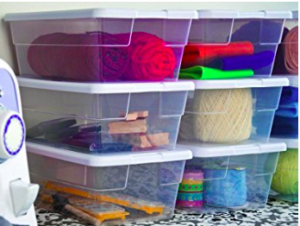
 2.Gather storage containers. We love to shop at hardware stores for ideas. Did you know you can buy empty paint cans? Those are marvelous for storing various tools. Also check out the dollar stores for assorted bins and baskets that are reasonably priced. We also found these great plastic shoe bins that are perfect for organizing materials.
3.Think carefully where you will store extra supplies for your maker space. There is nothing quite as exciting as receiving at 8:00 AM five huge trash bags of recycled items and having nowhere to put them except behind, in front and on top of your desk! And that reminds us…become VERY good friends with all of the custodians. They are the experts at helping you find locations to store extra items, as well as making sure that your “ treasures that look like trash” don’t get tossed out.
4.Send out a donation letter for items you would like. Letters can not only go to parents and grandparents, but stores and associations, and agencies. Really search your community for possible connections. We developed no fear in approaching anyone and everyone for items. (Did we mention the 1000 ping pong balls, wooden spools and paint stirrers that a group donated and DELIVERED to us? Five years later we are still making catapults with that amazing donation) We include a donation letter in our STEM Essentials freebie :5.Put donations away as soon as they come in. No excuses. Really. Trust us. We know. Two words. “Organized Chaos!!”
6.Create a poster with rules for your center. Keep it simple.We suggest: Plan;Persevere;Put Away.
7.Create an “open” and “closed” sign as well as a sign up sheet for the makerspace.
8.Hang an inventory list nearby so that the students can indicate when certain consumables are beginning to run low.If possible, solicit adult volunteers to be the docents for the makerspace. This will make your life easier, but is not necessary for a successful maker space.Source:http://www.getcaughtengineering.com/makerspace-in-the-classroom/
« Last Edit: May 28, 2019, 02:11:38 PM by najnin.ih »

Logged